Wednesday, April 30, 2008

Samplers - part 3 (Dr. REX)

Aright. So we've gotten pretty well into using samplers in Reason, specifically the NN19 and NNXT. We've used them to:
  • Play back multisample patches of instruments in Reason.
  • Load our own samples and map them to their own keyzones.
  • Loop a drum sample.
  • Chop up a sample and play the individual drum hits with a keyboard.
So we've covered most of the common features that are used in creating sample-based music, except for one big one:

TIMESTRETCHING

What is "timestretching"?

Wikipedia:
"Timestretching is the process of changing the speed or duration of an audio signal without affecting its pitch."

This is most useful when you find the perfect sounding sample loop that isn't quite at the right tempo.

Here's an example:

Say you make a song that is at 89 BPMs. Perfect tempo, you can't stop nodding your head when you listen to the song. Then you find this great drum loop that you would be perfect for fitting into the song, but its tempo is 97 BPMs.

Now, you know that by decreasing the pitch, you can make the tempo slower, so you drop the pitch and the drums are now playing exactly in time with the song. BUT, when you listen to it, the drums are all kind of screwed up and psychedelic, and they don't sound anything like the clean drum sample you started with. The kick drum is not thumping, the snare isn't cracking, the hi hats aren't crisp, so there's really no point in using it anymore.

But what if you were able to make the loop fit the song, without changing the pitch? That would change everything, right? Welcome to the wonderful world of timestretching, my friends.

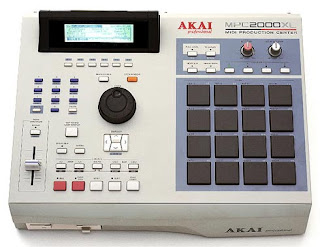
In terms of hip hop history, timestretching first started getting used a lot with the release of the Akai MPC2000XL. That was the first beat machine that incorporated the technology, and it became a pretty standard tool after that. Changed the production game.

Problem: Reason does not do timestretching!

So, why am I even bothering to tell you about it then?

For one thing, most DAWs (Pro Tools, Logic, Cubase, etc.) have a timestretching function, so you should be aware of it for when we get into using Pro Tools. But also, although it doesn't do timestretching per se, Reason does use a similar technology to accomplish a similar thing. In addition to the NN19 and NNXT, Reason has a sample-playback instrument called the Dr. REX.

Big difference between the Dr. REX and the other samplers is that while the NN19/NNXT can play back standard audio files (WAV, AIF), the Dr. REX can only playback special files created using another software program called Recycle.

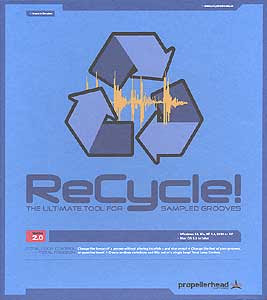
Recycle (which is made by Propellerhead, the same company that makes Reason) basically allows you to chop an audio file up into slices. The program automatically creates slices at points called attack transients, which are basically the main points where drums or other sounds are hitting. Once you've got the file chopped up into slices, you can load it into the Dr. REX player and it will automatically adjust the sample to whatever tempo the song is set to.


One thing that you should be aware of is that neither timestretching, nor beat slicing is a perfect science. The farther you take a sample away from its original tempo, the less realistic it's going to sound.

That said, let's work check this out:

1. Go into Media Share>Class Materials>Samples and find the file called Funky Drummer_break.rx2. Copy it into your folder on your hard drive. Be sure that you are copying the REX 2 file, not the regular wav file!
2. Create a new song in Reason and create a Dr. REX sample player.
3. Load the Funky Drummer_break sample into the Dr. REX.
4. Play some keys on your keyboard. What do you hear? Does this remind you of anything?
5. Set the tempo to 106 BPMs.
6. Set your loop markers for four bars (L on Bar 1, R on Bar 5)
7. Click on the button that says "To Track". What happens? What does this remind you of?
8. Now drop the tempo down to about 90 BPMs. What's it sounding like now?
9. Find the Transpose knob on the front of the sampler and change the key up to F#.
10. Transpose it back down to C.
11. Set it to a tempo that you like and incorporate it into a song. 24 bars. Use the filters and/or LFO controls.


Monday, April 28, 2008

Samplers- part 2 (loops)


Today we're going to get into using samplers to work with loops. Specifically, we're going to start working with breakbeats.

As we learned earlier, breakbeats were the parts of old school funk and soul records where all the instruments would drop out except for the drums. This is the part of the song where people would really freak out and go off dancing.

Kool Herc figured out that by having two copies of a record, he could extend the breakbeat for as long as he wanted, playing one record, then the other, then rewinding the break on the first record, etc. Some people would say that this was the real start of hip hop as a new, distinct style of music, using the breakbeat as the backbone of the whole genre.

A few years later, when samplers became affordable and had long enough sampling times (see "Samplers - part 1"), people were able to just record the breaks into the samplers and have them loop automatically for however long they wanted.

Today we're going to get into working with a particularly famous break from a song called "The Funky Drummer", by James Brown.

Let's listen to the original for a second...

Funky Drummer

So now we're going to work on getting the break into our own songs so that we can use it.

But first...

Disclaimer: Sampling other peoples' work without their permission is a violation of copyright laws. If you are merely sampling for your own educational purposes (like we are doing in this class), then you should be fine. BUT if you intend to create and SELL music that incorporates samples of other artists' work, you are legally required to get all necessary permissions from the owners for the use of those samples. Think about it...how would you feel about someone taking your music without your permission and then making money off it?

That said, check it out...

1. First, let's grab the sample you're going to be working with and copy it to your hard drive. Go to Media Share>Class Materials>Samples and find the file called "Funky Drummer_break.wav". Copy that into your folder on your hard drive.
2. Now create a new Reason song called "Breakbeat lesson 1_your name".
3. Create an NN19 sampler in your rack and make sure it is connected to a Mixer 14:2. 4. Click on the Browse Sample button at the top of the NN19.
5. Load the Funky Drummer_break file into the sampler.
6. Play some notes on your Oxygen 8 keyboard and find the key that plays the loop in its original pitch.
7. So what we've got here is a 1-bar drum break. In order to make it line up with everything else in your song, we've got to make the tempo of the song fit with the tempo of the break, so...first, set your L and R markers so that they are marking off a single measure (put the L on bar 1 and R on bar 2).
8. Now hit Shift-Tab on your keyboard to go into the Edit View of your NN19 sequencer track (the part that shows the keyboard and notes).
9. Click on the Pencil Tool.
10. Find key C3 and draw a note that is exactly one bar long.
11. Make sure the Loop On/Off button is lit up, then hit play and listen to the loop. What is happening?
12. Now let's adjust the tempo so that the sample loops perfectly...Lower the tempo until you get down to 101 BPMs. Sounds good, right?
13. OK, so now we've got something that we can work with.
14. Switch over to the Arrange View (hit Shift-Tab).
15. Now we're going to mark this sample loop into a group. Using the Pencil Tool, mark off 1-bar. You should now have a region that you can copy and paste as many times as you want in the song.

From here, you can go ahead and create a Redrum drum machine and start making a beat that can either go over the loop, or switch off parts with it. You might also want to try playing with the Filters on the NN19 and seeing how you can switch up the sound of the loop.

Your assignment:

Create a 24-Bar song that incorporates both the drum break and the your own original Redrum drum pattern. Here's the catch: the loop has to be played back at a pitch other than its original pitch, meaning a key other than C3. So you will probably have to adjust the tempo to make this work.

Hint: When you're trying to match the tempo, if you hear the loop getting cut off too soon, then the tempo is too fast. If you hear a gap at the end of the loop before it starts playing again, then the tempo is too slow.


Saturday, April 26, 2008

{Multisample Lesson}


Now we are going to do a lesson where we load samples of our own voices into the NN19.

1. Record two vocal samples into Pro Tools (the instructor will help you with this).
2. Load your samples into the Media Share folder and copy files into your folder on your computer
3. Open Reason and create a new song.
4. Create a NN19 Sampler
5. In the screen of the NN19 right click and select 'Split Key Zone'.
6. Click on the Key Zone on the left side and click the browse sample button
7. Load one of you two samples
8. Now click on the Key Zone on the right side of your NN19 screen and click the Browse Sample button.
9. Play some of the keys on your keyboard and notice where the pitch changes are happening.
10. Now lets change the key where the sample on the right plays its original pitch.
11. Find the knob called Root Key (under the NN19 screen).
12. Turn the knob until the root key is C4.
13. Your two samples should now play in their original pitches on Keys C3 and C4.
14. Make a beat that incorporates your samples.

Wednesday, April 23, 2008

Samplers - part 1


So, we've covered synthesizers and worked with each of the different synths in Reason. Now besides synths, there is a second category of instrument that you have probably already experimented with: the sampler.

"What's a sampler," you ask?

Better question: what's a sample?

There are actually two different definitions, depending on who you're talking to. You need to know both:


1. (common definition) A piece of a sound recording that is taken and incorporated into a new musical composition.

2. (technical definition) The smallest unit of a digital audio recording.

Let me just deal with the second one, briefly, because this is at the heart of understanding digital audio. We'll get deeper into this when we start working with Pro Tools and recording stuff.

OK, so we know that sound is really the vibration of air molecules, and that it moves in waves, right? So, when you've got sound going into a device like a microphone (aka a transducer), what's happening is that that sound wave is being converted into an electrical signal that has all the same properties (frequency and amplitude!) as the wave that was traveling in the air. This is called analog audio, because the electric wave is analogous to the sound wave in the air. Stay with me for a minute...

So, when you're talking about an analog audio recording, you're really talking about an actual physical representation of a sound wave that exists in one form or another. With digital audio on the other hand, what's happening is a computer is taking tons of tiny snapshots of the sound wave, and storing that information as a zeros and ones. The waveform doesn't physically exist anywhere, there's just a bunch of computer datat that describes what the wave is supposed to look and sound like. Don't stress about this, we'll get into this later, right now, just understand this:

The smallest snapshot that a computer takes of a sound wave is called a sample.

So, when you're listening to any kind of digital audio (MP3, CD, etc.), what you're actually listening to is one big, long series of these samples. "How many samples, you ask?" Well, I'm glad you asked! It depends on what format you're talking about, but...

CD quality audio samples at a rate of 44.1 kHz

Or,

44,100 samples per second.

Basically, the higher the sample rate, the better the quality of your audio. Most professional recording is done at 48 kHz or 96 kHz.

So we know what a sample is. Getting back to the original question then, what is a sampler? Wikipedia says:

A sampler is an electronic music instrument closely related to a synthesizer. Instead of generating sounds from scratch, however, a sampler starts with multiple recordings (or “samples”) of different sounds, and then plays each back based on how the instrument is configured.

So, a sampler is basically an instrument that can play back digital audio recordings (aka "samples").

Here's a quick and dirty history of hardware samplers:

Synclavier


  • Came out in 1975
  • Cost $200-300k

Fairlight CMI


  • Came out in 1983
  • Cost about $25,000
  • Supposedly Took 2 hours to boot up
  • Featured basic MIDI capability
  • Used by Herbie Hancock ("Rockit") and Kurtis Blow ("If I Ruled the World")
E-mu Emulator II

  • Came out in 1984
  • Cost $8,000 - 10,000
  • Had an option to add a hard drive
E-mu SP12

  • Came out in 1985
  • Had 24 onboard drum sounds
  • Featured 1.2 seconds of sample time
  • Had MIDI sequencing, which allowed you to create whole songs
  • One of the original hip hop production tools - classic gritty sound
  • Replaced by the SP-1200 (10 sec. sample time)
Akai MPC60

  • Came out in 1988
  • 13.1 sec of sample time (upgradable to 26.2)
  • 16 velocity sensitive pads
  • 40 kHz sample rate
  • Gave birth to the whole MPC family (2000/3000/2000XL), which became the standard hip hop production tools throughout the 90s.
  • Used by DJ Shadow on Endtroducing - the first album created only with samples.
Ensoniq ASR-10

  • Came out in 1992
  • Up to 44.1 kHz sample rate (CD quality!)
  • featured lots of onboard FX and sound processing
  • Not as popular as Akai MPCs, but it's still widely used by producers for its unique sound (Timbaland, Neptunes, Kanye).

So, from a hip hop/electronic music perspective, the sampler was a huge breakthrough because it allowed you to capture a drum break (or other sound) and then loop it, creating an infinite beat. (We'll get into this more in the next lesson).

But loops weren't the only thing samplers were good for.

Think about it, you have a machine that can take a recording of ANY sound and then play it back. That's cool, but what's really amazing is that you could actually hook up a tool like a keyboard to a sampler and then play the sample back, at all the different pitches of the keyboard. So, you could take a sample of a real instrument (say, a saxophone), or even a completely random sound, and then play it like a piano.

Only, it's never quite that simple...

See, the problem is, most samplers do know how to adjust the pitch of a sample so that it plays the correct pitches on all the keys of the keyboard, BUT the farther a sample gets away from its original pitch, the less it sounds like a real instrument.

Let's see for ourselves, using Reason's NN19 sampler:


  • Open Reason, create a new song, save it as "Multisample demo"
  • Make sure there is a Mixer 14:2 in your rack
  • Create an NN19 sampler
  • Right click on the Browse Patch button and click on Initialize Patch.
  • Now click on the Browse Sample button
  • Go to Reason Factory Sound Bank>NN19 Patches>Piano>Bright Piano>PianoBC3.wav and click OK to load that audio file.
  • Play C3 (the first white key on the left side of the keyboard) and listen to how it sounds.
  • Now play C4 (one octave up from C3). How does that sound?
  • Now hit the Octave Down button on your keyboard and play the low C key again. How does it sound?
Now create a second NN19 in your rack.
  • For this one, click on the Browse Patch button.
  • Go to Reason Factory Sound Bank>NN19 Patches>Piano>BRIGHTPIANO.smp and click OK.
  • Now play the same notes that you did a minute ago. How do they sound different?
So, most modern samplers use what are called multisamples for recreating real instruments. Multisamples are just a bunch of separate, individual audio files of an instrument being played at different pitches. These audio files are then mapped to certain sections of the keyboard that are close to the original pitch of the sample. The collections of these audio files and the information about where to map them on the keyboard are conveniently put into what are called patches. Patches make it easy for you to quickly load up a good sounding instrument into your sampler and start playing, without having to deal with mapping all the sounds yourself.

Really good quality multisamples are especially important when you're trying to realistically recreate things like orchestral instruments, which have highly detailed sounds and are easy to tell when they are off.

So...your assignment right now is to find some good orchestral patches and use them in a song.

Please make me a song that meets ALL of the following requirements:
  • The song must be at least 24 bars long.
  • You may only use 1 Redrum and as many NN19s as you want. NO OTHER INSTRUMENTS!
  • 1 of the NN19s must be some kind of Strings
  • 1 of the NN19s must be some kind of Brass
  • 1 of the NN19s must be some kind of Woodwinds
Other than the above requirements, it's up to you. Please put your beat in today's folder in the Media Share folder.

Synthesizers-part 2 (Malstrom and Thor)


Alright, so last time we got into the knob-tastic world of synthesizers and did a little bit of programming our own patches using the Subtractor.

Today, we're just going to take a little bit more time to talk about synths and take a look at the other synth instruments that are available in Reason.

So, we are pretty familiar with the Subtractor. Do you remember what type of synthesizer the Subtractor is?

Analog synthesis (aka "subtractive synthesis") was the classic, old school way that synths worked. This method of synthesis used actual electrical signals as the basis of the sounds it made. Some of the most famous makers of early analog synths included Moog, ARP and Roland. Here is a picture of the Roland Juno 106, one of the first "affordable" synths on the market:


This is one of the all-time most used synth. It is one of the classic sounds from the 80's. You've probably heard it on hundreds of songs.

As technology progressed, instrument makers started using different methods of synthesis that allowed for more complex sounds. The next big one was called FM Synthesis, or Frequency Modulation Synthesis. Using this method, you could basically take two signals and have one mathematically alter the other. Don't worry, we're not going to get too deep into this, but just know that the sounds were more advanced and allowed people to try to create synth patches that resembled the sounds of instruments. That's when you started to hear cheesy synth horns and strings on pop songs.

After that, things started to get Digital. With digital synthesis, you had a lot more options and a number of synthesis methods came out. One of these was Granular Synthesis. With Granular Synthesis, you are basically taking a sample of an actual audio sample (say a flute sound), and then breaking it up into hundreds of little tiny snippets, or grains. Then, using the different controls, you can reconfigure and mess with all these grains and create completely orignal, crazy new sounds.

This brings us back to Reason:


The Malstrom pretty much uses Granular Synthesis as the way it creates its sounds, though it is laid out very similarly to the Subtractor. Like the Subtractor, it uses two oscillators at the starting point of its sounds. However, if you go through the different patterns, you see that it's not using simple waveforms, but the names of actual instruments as the basis of its sounds. Plus, using the Index sliders you can determine what part of the sample you want to work with.

The third and newest Reason synth is the Thor.

This guy is pretty intense and sounds AWESOME. Basically, instead of using two Oscillators to create its sounds, it uses 6. It also has 6 filters. This guy is incorporating several styles of synthesis at once and allowing for highly detailed and complex sounds.

So, start comparing these different synths and seeing the kinds of sounds they all make. Some are definitely better than others for different styles of music. But they're all tools available for you to use and combine to create your own original sounds.

Monday, April 21, 2008

Synthesizers - part 1 (Subtractor)


There are basically 2 categories of instrument in Reason. For the next few classes, we're going to take a look at the first one: synthesizers.


What is a synthesizer?

Wikipedia says:

A synthesizer is an electronic instrument capable of producing a wide variety of sounds by generating and combining signals of different frequencies. There are three main types of synthesizers, which differ in operation; analog, digital and software-based. Synthesizers create electrical signals, rather than direct sounds, which are then processed through a loudspeaker or set of headphones.


So, basically, you've got a device that electronically generates one or more audio signals. And then by combining and processing those signals, you can create completely orignal sounds. There are several ways that different types of synthesizers operate. The simplest one is called analog, or "subtractive synthesis".

We are actually already familiar with the sounds of subtractive synthesis though working with our friend...

...the Subtractor!

So, obviously there is a lot going on with all these knobs and sliders and stuff. But once you know how to look at it, it really isn't so overwhelming. Today we're just going to focus on three sections, and from there you should know a lot about almost every instrument in Reason. The three sections are:

  1. Oscillators
  2. Filters
  3. ADSR Envelopes.
We'll start with the first: Oscillators.

Oscillators are basically the heart of the instrument. This is where the sounds originate from. The Subtractor has a handful of very basic types of sound waves that it uses as the raw material for creating instrument sounds. Think of these as the block of stone that a sculptor starts with before he/she starts chiseling it into a specific shape. Any guess what those sound waves might be?

That's right: Sine waves, Square waves, Triangle waves, Sawtooth waves, and some others that are variations of these guys.

Subtractor has two different oscillators that it can combine to create more complex sounds. Let's check this out for a second...(demonstration)

OK, so besides being able to play back two sound waves at the same time, Subtractor lets you adjust the pitch of each each one. What do you think that does to the sound? It also lets you add noise, if you're into that.

Next, we have the Filters.


So, if the sound waves are the block of stone that a sculptor starts with, then the filters are like the chisels and other tools that he/she uses to shape it into what he/she wants. Now filters are what put the "subtractive" into subtractive synthesis, and they are a really common audio production tool in general. Think about it, what does a filter do?

We've got four basic types of filters to choose from, and they all reject different parts of the frequency spectrum. They are:

  • Low Pass (LP)
  • High Pass (HP)
  • Band Pass (BP)
  • Band Stop (aka "Notch")
Remember, the key word here is "pass"; what frequencies are being allowed to pass through the filter? In a Low Pass filter, the "lows" are being allowed to "pass". In a High Pass filter, the "highs" are being allowed to "pass". Here, let me just show you... (demonstration).

So, in Subtractor, you can select whichever filter you want to work with by clicking on the red dot. Then you can adjust the Cutoff frequency (the point where the filter starts working) by dragging the slider called Freq.

OK, so the last section of the synth we're going to cover today is the ADSR Envelope.

ADSR just stands for: Attack, Decay, Sustain, Release, and it's referring to the way the volume of a sound evolves over time. Check out this picture of a waveform:


What it is showing is the different parts of the total sound. Briefly:
  • Attack - the quick rise of the volume up to the highest level.
  • Decay - the drop from the highest peak to the average level of the sound
  • Sustain - the average level of the sound
  • Release - the fade out
Here is a common diagram of an ADSR Envelope:

Now, every sound has these four basic qualities, but with synthesizers, you can actually control the points that these things are happening. You can do this in the section called Amp. What do you think "Amp" is short for?

OK, so if your mind isn't completely overloaded yet, know that you can actually use ADSR Envelopes for more than just the volume of the soundwave itself. One of the most common things is to connect it to the Filter and have the filter moving in a completely different way than the Amplitude envelope. Bottom line: more interesting sounds.

OK, we'll cut the lecture off here today and get into actually making a patch from scratch.


Wednesday, April 16, 2008

Sound fundamentals (part 2)


Last time we got into some of the basics of sound, discussing the two main attributes:

Frequency and Amplitude.


Today we're going to get a little deeper into this stuff so that we can understand how it relates to the music we make using tools like Reason.

OK. So, frequency is basically dealing with pitch, right? How high or low a sound is. Measured in Hertz (Hz). Let's listen to a few tones to recalibrate our ears:

So what we were listening to were pure tones. Here is a picture of what a pure 440 Hz tone (aka "Concert A") looks like:
What we have been looking at and listening to so far are what are called sine waves. Sine waves are basically pure tones - nice and smooth and even, no additives or preservatives. But, as with so many things in life, reality is almost never so smooth and even...

Here is what Concert A (aka 44oHz) looks like when played by a grand piano:


Whoa. Lots of stuff going on here. I should point out that this picture is zoomed way out, so we're not seeing the individual waves like we were in the picture of the sine wave. But my point is this: there is a LOT more than just a simple 440Hz sine wave playing when you hit the A key on a piano.

Major point #1: Almost no natural sound contains only one frequency.

You might be asking yourselves then, "What are the other frequencies?"

Short answer: harmonics.

Harmonics are whole number multiples of a specific frequency.

OK, so I just lost about half the class with that last sentence. But it's really not that complicated. Check it out:


So, we're looking at the first 5 harmonics of a vibrating string. The first harmonic is what is called the fundamental frequency. The fundamental is like the "main note" being played. For example, in the picture of the piano note above, 440 Hz is the fundamental, but all that other stuff in the waveform is a bunch of harmonics:

1st harmonic (aka fundamental) = 440Hz
2nd harmonic = 880Hz (440 x 2)
3rd harmonic = 1320 Hz (440 x 3)
4th harmonic = 1760 Hz (440 x 4)
5th harmonic = 2200 Hz (440 x 5)

Every musical instrument has harmonics, but the amounts and combinations of these harmonics are unique to every instrument. This is why a guitar sounds like a guitar, a snare drum like a snare drum, Mariah Carey like Mariah Carey, etc.

Here is a comparison of a flute, a clarinet, an oboe, and a saxophone all playing Middle C (256 Hz):

As you can see, they are similar (they are all instruments from the woodwind family), but it is the unique harmonic content that gives each one a unique sound.

Major point #2: an octave is a doubling of frequency.

Remember our old friend the octave? A couple classes ago I described an octave as "a set of all the notes you can possibly play".

This is true. That is a musical way of understanding what an octave is.

But you can also look at it from a scientific perspective and see that everytime you go up an octave, you are doubling the fundamental frequency of the key that you started from.

Now that you know about octaves, see if you can answer this question:
Even-numbered harmonics are generally considered to be more musically pleasing than odd numbered ones. Why do you think this might be?

1st harmonic (aka fundamental) = 440Hz
2nd harmonic = 880Hz
3rd harmonic = 1320 Hz
4th harmonic = 1760 Hz
5th harmonic = 2200 Hz


Major point #3: Using electronic equipment (aka synthesizers), it is possible for humans to create all kinds of original sounds that don't exist in nature.

We will be getting deeper into this later when we discuss synthesizers, but for now let's just be aware that there are a handful of common types of sound waves that are used as building blocks in creating electronic sounds and instruments. They are:


1. Sine wave - Our old friend. The simplest of all sounds. A pure frequency.
2. Square wave - A tone with an infinite set of odd harmonics. Pretty harsh sounding, but it's a good material to start with when you're creating new sounds.
3. Triangle wave - A tone that also has an infinite set of odd harmonics, but they fall off in volume more quickly than the square wave.
4. Sawtooth wave - A tone that has all the related harmonics.


We'll stop here for the moment. In the next lesson we will learn about phase, filters and volume envelopes.

Oh yes.

Monday, April 14, 2008

Sound fundamentals (part 1)

Alright, so far we've discussed a bunch of different topics, from music theory to hip hop history to navigating software. Today we're going to talk a little about some fundamental audio concepts.

What is sound?

On the most basic level, sound is the vibration of molecules. Since we live in an air-filled atmosphere, sound for us is usually the vibration of air molecules.

Whenever there is any kind of movement or friction or impact in our air-filled environment, the air molecules get compressed and are pushed out of their normal position. They then react by springing back in the other direction. Same concept as a pulling a piece of string tight and then plucking it; the molecules swing back and forth.

It's important to understand that these vibrations don't just stay fixed in one place; as the vibrating molecules get pushed out of place they bump into their neighbor molecules and cause those molecules to vibrate, causing their neighbors to vibrate, etc. Then those molecules bump into their neighbors, and so on. Basically, the original sound vibration spreads out in all directions in waves, sort of like dropping a rock in a pool of water. This is how the sound gets to your ears. The waves move outward at a steady rate, but get weaker and weaker as they move farther and farther away from the source...


If we try to draw a picture of a sound vibration, we get something like this:
A picture like this is called a waveform.

If we zoom in really close, then we see somthing like this:


What this diagram is showing you is a single cycle of a sound, and in this picture we can see the two basic aspects of sound, which brings us to the main point of today's lesson...

FREQUENCY and AMPLITUDE!!!

On the most basic level, here is what you need to understand:

Frequency = pitch (Hz)

Amplitude = loudness (dB)

Now, more specifically, frequency is the number of cycles that happen in a single second. The faster the vibrations are, the more cycles are happening per second, the higher the pitch. In the waveform diagram above, the horizontal axis is showing frequency. The closer the cycles are to each other, the higher the pitch and vice versa.

The unit of measurement of cycles per second is the Hertz (Hz).

Amplitude is a little trickier to explain, but basically it is the amount of energy that is going into making the sound. In a waveform diagram like above, the height of the wave is showing you how loud the sound is.

The unit of measurement of amplitude is the decibel (dB).

Last and SUPER IMPORTANT thing to know for today:

The human range of hearing is approximately 20Hz to 20,000Hz.

With this information, we can start to get into really working with sound. Tune in next time for the wonderful world of harmonics, folks!

Monday, April 7, 2008

Basic Keyboarding Part 2 - the Major and Minor Scales


So, we've already figure out that the major and minor scales can be identified with the mood of how they sound (happy vs. sad). And we've practiced playing the very simplest of the Major scales - C Major.

What you should know about scales is that they are created by the amount of space between each note.

If two notes have a note in between them, that is called a
whole step (for example, C to D)
If two notes are right next to each other, that is called a
half step (for example C to C#)

How much space is in between E and F?

Ok, so now that we know whole steps and half steps, I can reveal to you the formulas for the Major and Minor scales. With these formulas, you can create scales from any key on your keyboard.

Major scale formula:

W-W-H-W-W-W-H

Minor scale formula:

W-H-W-W-H-W-W

So, with this info, you're going to create two 4-bar loops, same as you did for the C Major scale. You are going to do G Major and A minor.

Call this Reason session "
Major & Minor scales"

Basic Keyboarding Part 1 - Getting Around

So, today I'm going to spend some time working with folks who have never taken a music lesson and get them up to speed with knowing their way around the keyboard.

Of course, some of you have already taken music lessons and don't need this review. So, if you think you're one of those individuals, please do the following assignment:

  • Create 2 short Reason songs,
  • Each will be at least 16 bars long.
  • The first one will feature a melody in the key of D Major (save this song as "Melody_DMajor_(your name)".
  • The second will feature a melody in the key of A minor (save this as "Melody_Aminor_(your name)".
If you aren't sure about how to do the above projects, then please hang out with us and review some basics.

First, take a look at the picture below:


We are looking at one octave of a keyboard, plus one extra note. Which note?

So, an octave is basically one section of a keyboard that contains all the notes you can possibly play.

In Western music, there are a total of 12 possible notes. One set of these 12 notes makes an octave. With me so far?

"OK", you might be saying to yourself, "but I've seen a piano before, and there are way more than 12 notes on that thing."

True. So let's see what happens when you play all the notes on your Oxygen 8, from left to right.

1. Make a new Reason song.
2. Go to File>Save and call it "C Major scale_(your name)."
3. Create a Subtractor and make sure it is connected to a Mixer 14:2.
4. Load a patch called "Vibra.zyp" into your Subtractor. You can find this patch in Reason Factory Sound Bank>Subtractor Patches>PolySynths>Vibra.zyp
4. Now play all the notes from left to right. How do the sounds change as you go from left to right? What happens after you get to the middle of the keyboard?

So, a keyboard is made up of octaves stacked on each other. They go from low to high in terms of pitch, but the total number of notes you can play is still just 12. These same 12 notes just keep repeating, getting higher and higher

So what are the names of these notes, you ask?

Simple, the white keys are just the first 7 letters of the alphabet (A-B-C-D-E-F-G) repeating over and over.
The black keys are some extra things called sharps and flats.

We'll get more into sharps and flats later, but for now, just know that a sharp goes up, and a flat goes down. So the black key to the right of A is A sharp. The black key to the left of A is A flat. Make sense? What might another name for A flat be?

Ok, now let's take another look at where all these keys are on the keyboard.


What note does this octave start with? Does that seem a little weird to you? Me too. Don't ask why it is that way. It just is what it is.

But that leads us into the last thing we're going to cover today: scales.

Recap: how many possible notes are there?

Right, 12. but just because you have all those notes, doesn't mean that they will sound good with each other. So a scale is basically a set of notes that sound good with each other.

The two most common scales are the Major and Minor scales. Very generally, the Major scale sounds happy and upbeat. You hear it a lot in pop music.

The Minor scale sounds more sad or intense. You hear it a lot in hip hop and other harder kinds of music.

Today you're going to record yourself playing the C Major scale into Reason

1. Set your Click track to 85 BPM.
2. Set your loop markers for a 4-bar loop (L on Bar1, R on Bar2)
3. Hit play and practice playing all the white notes, from low C to high C in time with the beat. Try playing the high C twice, so that you get an even number of notes in your loop.
4. When you are ready, record yourself.
5. Use the quantize function to fix your performance, or just edit the notes directly.
6. Save it up and you're done with this lesson.


Saturday, April 5, 2008

Recreate a beat - part 3

Ok, so we've pretty much got the drum beat nailed down now.

For the last part of this lesson, we're going to record ourselves playing the synth melody for "Dumb It Down".

1. First, create a Subtractor synthesizer by going to Create>Subtractor or by clicking on the Subtractor in the Tool Window.
2. Now load in the correct patch by going clicking on the Browse button. Go to Reason Factory Sound Bank>Subtractor Patches>MonoSynths>Rave Lead.
3. Play some notes on your Oxygen 8. If everything is hooked up correctly, you should be hearing it play back.
4. Now let's find the notes used in this melody. They are C, A flat, B flat, and F.
5. Set your Loop Markers around the first 4 bars of the beat (L on Bar 1, R on Bar 5).
6. Listen to the beat on You Tube for a bit to get a feel for when then notes are played. Notice that the last note is held for a long time. The whole melody is a total of 4 bars long.
7. Now switch back to Reason make sure that the Loop On/Off button is lit up in the Transport Window. Hit play and practice playing the melody over the beat.
8. When you are ready to try to record it, hit the big red Record button in the Transport. Don't feel pressured to start playing right away. You can let it play through the loop once and then start playing when it comes back around.
9. When you're done, press the Record button again, or Stop if you want to stop.
10. How's your performance? Tight? If so, then go ahead and Copy and Paste this Loop for the whole 16 bars.
11. Save, and you're done with Dumb It Down forever.

If your performance was not tight, however, Reason can help you through the miracle of Quantizing...

1. Make sure that your new Region is highlighted
2. Go over to the Tool Window and click on the Tool tab.
3. In the section where it says Quantize, hit the Apply button. What happens?
4. So you may need to fine tune some of the notes even more.
5. To do this, double click on the Region and scroll up or down until you find your notes.
6. Listen to it play back and try to spot where the problem notes are.
7. Click and drag the note in the appropriate direction until it sounds like it's in the right place (make sure that you're only moving one note, and not all of them!)
8. Drag the right edges of some of the notes to be long enough.

Save it and you're done.

Recreate a beat - part 2

Now we're going to continue creating the Dumb It Down beat.

Take a quick listen to get reacquainted with it: http://www.youtube.com/watch?v=q1Et1siZhTk

Pay attention to how the drums are switching up. How do they change? How
often do they change?

Ok, so we've already knocked out the first part of the beat. What you'll notice is that every 2 bars, the kick drum changes up. Other than that, the beat stays constant. So all we need to do is to create a new drum pattern with all the notes in exactly the same places, just with a different kick drum sound. Actually, we already loaded the 2nd kick sound into Slot 2 last time, so we can just go ahead and make a new pattern in the Redrum.

BUT, since we're just doing pretty much all the same notes and changing one thing, let's just copy and paste our original pattern:

1. Click on Pattern 1 in the Redrum.
2. Go to Edit>Copy Pattern
3. Now click on Pattern 2 in the Redrum
4. Go to Edit> Paste Pattern
5. Click the Run button to listen to the pattern. (Make sure Enable Pattern Section is lit up)
6. Now click the Select button at the bottom of Slot 1 and make a note of all the notes that are lit up (1, 3, 4, 8, 10, 12). Click on each of these and turn them off.
7. Now click Select on Slot 2.
8. Click on all the notes that were previously lit up in Slot 1.
9. Hit Run to listen to the new beat.

Now let's get the new pattern down into the sequencer.

1. Set the loop points to mark off one bar:
L on bar 3, R on bar 4.
2. Click on the Redrum track on the left of the Sequencer window.
3. Click on Pattern 2.
4. Go to Edit>Copy Pattern to track.
5. Click on Enable Pattern Section to make sure you don't play back two copies of the beat.
6. Hit play and make sure it's playing back right.

Now for the last step, let's arrange it so our two drum loops switch off every 2 bars.

1. Click on the
Region of the first drum loop in the Sequencer window and go to Edit>Copy.
2. The
Playhead should move to Bar 2. Go to Edit>Paste.
3. Now click on the Region of the second drum loop and go to Edit>Copy.
4. The Playhead should be at Bar 4. Edit>Paste.

So now you should have a full 4-bar loop. Move your Loop markers to loop the whole thing:
Put the L on Bar 1, and the R on Bar 5.

Hit play and listen to the sweetness of the beat.

SAVE.

In the last lesson, we will be moving on to the melody...

Friday, April 4, 2008

Recreate a beat - part 1


This is the first part of a 3-part lesson where you will be remaking the beat to "Dumb It Down" by Lupe Fiasco.

First, listen to the song to get familiar with it:
http://www.youtube.com/watch?v=q1Et1siZhTk

What kinds of sounds are being used here? Specifically, how would you describe the drum sounds?

OK, so let's take a crack at this...

1. Launch Reason and create a new session (File>New)
2. Right off the bat, let's give this a file name (
"Dumb It Down_your name") and save it into our folders:
(File>Save As>My Documents>ADP Audio1 Chris Runde>Reason Stuff>
Dumb It Down_your name)
3. Now let's set the tempo to 95 BPM.
4. Make sure that you have a Mixer 14:2 in your rack. If you don't, then create one by either clicking on it in the Tool Window, or going to Create>Mixer 14:2.
5. Once you've got a Mixer 14:2, then go ahead and create a Redrum Drum Machine.
6. Now let's load some drum sounds into the machine. You can load sounds into each of the 10 slots on the Redrum by clicking on the Browse button in each one. This will bring up a window where you can search for the audio files. All of the sounds for this project can be found under
Reason Factory Soundbank>Redrum Drum Kits>xclusive drums-sorted.

Here are each of the four files I want you to load into the first four slots of your Redrum:

Slot 1 - BassDrums>Bd3_Riot.aif
Slot 2 - Bass Drums>Bd_Xtc7.wav
Slot 3 - SnareDrums>Sd2_HardKnox.wav
Slot 4 - HiHats>Hh_Xfile2.wav

7. Now that we've got our sounds loaded, we can begin to build our first drum loop. Let's start with the snare...
  • Press the Select button at the bottom of Slot 3 (Sd2_HardKnox).
  • In the sequencer section of the Redrum, click on squares 5 and 13 and hit play to listen.
  • Next, hit Select on Slot 1 (Bd3_Riot).
  • In the sequencer, click on squares 1, 3, 4, 8, 10, and 12. Starting to sound like an actual beat, right? Now, for the final touch let's add some hi hat...
  • Hit Select on Slot 4 (Hh_Xfile2) and in the sequencer, click on squares 1, 3, 4, 5, 7, 8, 10, 11, 15, and 16. Sounds fairly close to the real song, right? Sorta? Kinda?
8. OK, so it's cool that we've got our beat happening in the drum machine itself, but what we need is to get the loop down into the sequencer window. Do this to make that happen:
  • First, set your Loop Markers (the L and the R). Put the L marker on the 1, and the R marker on the 2.
  • Now click on the Redrum track on the left of the Sequencer window and make sure that it is highlighted.
  • On the Redrum machine itself, find where it says Pattern and click on the number 1 (it should already be lit up).
  • Now go up to the top of the screen and go to Edit>Copy Pattern to Track. If you've done all the above steps, you should see a colored box appear down in the Sequencer window. Yes?
9. Hit play and listen. Does it sound a little funky? It should, because Reason is actually trying to play back two versions of the drum loop at the same time. Let's turn off the one playing from the drum machine's onboard sequencer; click the box that where it says Enable Pattern Selection.

10.
Save, save, save!!! (File>Save).

Alright, congratulations! You just your first Reason drum loop and completed the first part of the Dumb It Down beat. Move on to the next lesson to learn how to switch the beat up...

Wednesday, April 2, 2008

Welcome!

Welcome to the first day of Advanced Digital Pathways Audio! This is the main info spot for the class. I will be posting lessons, announcements, and other random stuff here, so check back frequently. Also, I want everyone to leave comments and give feedback. Please feel free to speak your mind, but try to keep it positive.

I'm excited to be working with you!