Wednesday, May 28, 2008

{Interview Assignment}

"What is the single most important issue facing your generation?"

This is the question I have for you.

Whatever your answer is, I want you to explore the issue by getting some opinions from your classmates. To do this, I want you to do the following:

  1. Think about the question.
  2. Come up with 5-10 questions of your own that explore the issue.
  3. Interview 5 of your classmates and have them answer your questions. Record the interviews in Pro Tools. Call the session "Class Interviews_(your name)".
  4. Once you have all the interviews recorded, create a new track called "Final"
  5. Edit together all the best parts of the 5 interviews. Get creative and put them together in a way that makes sense to the listener.
  6. Turn in a copy of the Pro Tools session and a text document with your questions.
The Pro Tools session should have:
  • Each interviewee recorded on a separate track.
  • Each track labeled with the the interviewees' names.
  • Good levels (no clipping!).
For the text document, you can use Open Office.org Writer to type up your questions.

Please call this file "Class Interview Questions_(your name)".

Please put a copy of both the Pro Tools session and the text document on the Media Share folder in Media Share>Student Work>Pro Tools stuff>Class Interviews.


Intro to Pro Tools - part 2 (Working With Your Audio)


So we've figured out how to get audio into Pro Tools (importing, recording) and we've learned a little bit about how PT's folder structure works. But once you've got the audio in there, how do you start working with it? In other words, what are the "tools" of Pro Tools?

There are 6 basic Edit Tools that let you interact with your media in different ways. They are:

1. Zoomer Tool - Let's you zoom in and out around a particular area within a track.
2. Trim Tool - Lets you adjust the left and right sides of an audio region and quickly get rid of the parts you don't need.
3. Selector Tool - Lets you position the playback cursor or select an area for playback/editing.
4. Grabber Tool - Lets you grab a whole region and move it around.
5. Scrubber Tool - Lets you "scrub", or listen closely to a piece of audio by clicking and dragging the cursor over it. Sounds really cool (like a turntable), but unfortunately you can't record it.
6. Pencil Tool - Lets you get in and redraw the waveform data. You mostly use this to repair little pops and clicks in your file. Important: using the pencil tool is a destructive process!

Now in addition to the 6 basic tools, PT also lets you use what's known as the Smart Tool. The Smart Tool gives you the functions of the Trim, Selector and Grabber tools all at once. You move between these tools by moving the cursor over different parts of the region. In addition to the tools I just listed, the Smart Tool also makes it easy for you to do Fades.

Fades are important for helping to clean up audio because they help you clean out the edges of your audio, where there is a lot of potential for clicks and pops. They also let you seamlessly blend two pieces of audio together by doing what's called a crossfade.

Learning to use these tools efficiently will get you well on your way to

Wednesday, May 21, 2008

Intro to Pro Tools - part 1


Congratulations! You have officially graduated from the World of Reason and are now moving into the Universe of Pro Tools.

So what does Pro Tools do? Basically, it gives you all the main functions of a recording studio on your computer:
  • It lets you record
  • It lets you edit
  • It lets you mix
Beyond that, though, it also serves as the center of your music production setup. Meaning that it can connect to and control all of your software and hardware instruments using MIDI.

A software program that can do all of these things (audio and MIDI) is called a Digital Audio Workstation (DAW).

Pro Tools is definitely not the only DAW on the market. Other popular DAWs include Logic, Cubase, Nuendo, Sonar, and others. Pro Tools isn't even necessarily the "best" DAW. Lots of people feel that other programs (e.g. Logic) are actually a lot better for certain things, like recording MIDI.

So why then does everyone seem to be using Pro Tools these days? Probably a number of reasons, including ruthless marketing tactics by Digidesign. Personally, I think that Pro Tools is laid out in a very simple, straight-forward format. It's easy to look at and get around in.

There are actually two main components to any Pro Tools setup: the software and the hardware interface.

The software is where the actual recording/editing/mixing happens.

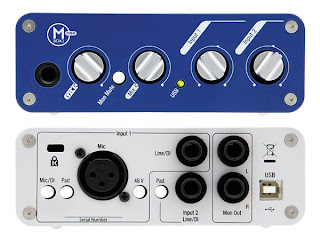
The interface is just a piece of equipment that lets you get audio into and out of the software. In our classroom we have two different types of interface: the Mbox2 Minis on the student stations, and the Digi 003 on the instructor station. Even though they look really different, they are still performing the same basic function - audio in/audio out.

Important: Pro Tools will not work if it doesn't have a Digidesign interface connected to the computer!

OK, so let's go ahead and open Pro Tools and see what we're dealing with.

To Import your Audio files into Pro Tools:
  1. Create a new Pro Tools session: Go to File>New Session.
  2. Name it like this: (song title)_(your name)
  3. Make sure the song is being saved into My Documents>ADP your folder>Pro Tools Stuff.
  4. Now go to File>Import>Audio files.
  5. Find the folder on your hard drive that contains all the audio files you exported from your song in Reason.
  6. Draw a box around all of them to highlight them.
  7. Hit Add Files.
  8. Hit Done.
  9. You should see a new window pop up asking you to choose a destination folder. If you see the Audio Files folder selected at the top, then go ahead and hit the Use Current Folder button at the bottom of the window.
  10. Another window will pop up that says "Processing Audio"
  11. Then another window will pop up, called "Audio Import Options". Make sure "New Track" is selected and hit the Choose Button.
All your audio files should now be in Pro Tools.

Saturday, May 17, 2008

Exporting Audio from Reason - part 2 (Exporting Individual Tracks)

So, Exporting Songs is fairly straightforward. However, if we want to really work with our beats in a mixing software program like Pro Tools, then we really want to be working with individual tracks, not entire songs.

That means we need to figure out how to get those individual tracks out of Reason. There are a couple different ways to do this, but the most straight forward is to Export the individual audio tracks in exactly the same way that we did the Stereo Mixes. One important difference, though, is that we need to Bypass the Mastering Combinator when we export. We do this because the Mastering Combinator is meant to be working on an entire song, not on just one instrument. Therefore, it's going to do weird things to the track if you just have a single instrument running through it.

To Export Individual Audio Tracks, do this:
  1. Make sure you have a folder created where you can store all your tracks.
  2. Bypass the Mastering Suite Combinator.
  3. Check all the volume levels of your tracks and adjust them as needed.
  4. Set the E to the end point of your song.
  5. Solo the individual track you want to work with in the Mixer.
  6. Go to File>Export Song as Audio File.
  7. Choose the folder that you are saving your work to.
  8. Name the file whatever the instrument is. Example: "Drums.wav", "Bass synth.wav", etc.)
  9. Hit Save.
  10. Choose your Sample Rate and Bit Depth. Again, unless you have a specific reason, the following are fine:
    • Sample Rate: 44,100 Hz
    • Bit depth: 16
And you're done! Stay tuned to learn how to import your tracks into Pro Tools...


Exporting Audio from Reason - part 1 (Stereo Mix)

As you start finishing your songs and are happy with the arrangement, the mix, etc., you can start thinking about Exporting your songs as audio files.

What is Exporting, and why do you need to do it?

Well, right now your songs are Reason files (*.rns). They only play back in Reason. You can't burn them to a CD, you can't listen to them in iTunes, you can't upload them to Myspace/imeem/etc. You can only open them on a computer that has Reason on it.

In order for you to do all the things I just mentioned, you need to convert the song into in audio file. Doing this is super simple, but before you do it, you really need to be aware of a couple of things. The main one is that you need to make sure that nothing is clipping.

Clipping is when something is distorting digitally. It happens when the volume of your track(s) is louder than the computer can handle. Usually it is really obvious and sounds like things are crackling in an ugly way. Sometimes, though, you can't immediately hear it, so you don't do anything about it until it's too late. This is now getting to be a special problem in Reason because the Mastering Suite Combinator is hiding the clipping from you.

In general, the way you avoid clipping/distortion is to make sure that none of your tracks' volume levels are getting all the way to the top of the meter. To make a track not clip, simply turn down the volume.

However, if you do turn a track down, pay close attention to what is happening to your overall mix. You may have to adjust the other tracks' volume levels to keep things balanced the way you want.

Once you're happy with the mix and you've checked to make sure there's no clipping going on, you're ready to start exporting.

To Export the whole song as a stereo mix, follow these steps:
  1. Make any final adjustments to volume levels.
  2. In the Sequencer Window, make sure the E is set to just past the end of your song. This tells Reason where the end of the song is.
  3. Go to File>Export Song as Audio File.
  4. Name the file. For this class, use this format: (song name)_(your name)_(date)
  5. Choose the location where you want this saved. Please don't take this for granted, or you may never find your file again!
  6. Hit Save.
  7. Choose the resolution of your audio. Unless you have a specific reason, for now let's just do:
    • Sample rate: 44,100 Hz
    • Bit depth: 16
OK, so that's how you do a Stereo Mix of your stuff.


Monday, May 12, 2008

Arrangement - part 1 (Melody)


Today, first we're going to talk a little bit about arrangement.

For our purposes, arrangement is referring to the order and pacing of the parts of a song.


Wikipedia says:

"A satisfactory musical arrangement will most likely (ibid, p.4):

  • Provide "contrast between high and low sounds"
  • Avoid heavily doubled parts with an emphasis on solo sections
  • Be "sufficiently transparent to allow the musical lines to be clearly heard" and
  • Not have all the instruments playing throughout."
So the goal of the arrangement is really to keep the song moving and to keep the listener's interest.

You could think about a piece of music as telling a story. When you tell a story, you don't just keep saying the same thing over and over again - you try keep the listener wanting to know what's going to happen next, even though you might keep coming back to certain themes.

Now with music, it's a similar concept. You've got to keep things moving forward for the listener. There are lots of different ways you can do this, but in pop music (rock, hip hop, etc.), there is a very specific and consistent formula that is used in building songs. It goes something like this:

INTRO - VERSE - CHORUS - VERSE - CHORUS
- BRIDGE - VERSE - CHORUS - OUTRO

So what are all these words and what does the order mean?

  • Intro - Beginning of the song that establishes the vibe.
  • Verse - The main sections of the song where the "story" is being told. Generally, a lot of the instruments drop out, or are softer in the mix so that you can focus on the vocalist. In a lot of pop music, the Verse is 16 bars long.
  • Chorus - aka "The Hook". This is the part of the song that is repeated and is generally the most exciting. It is the part that is easiest for people to remember and sing along to. The Chorus is usually shorter than the Verse, though sometimes you can have a couple of Choruses playing back to back, especially at the end of song. In a lot of pop music, the Chorus is 8 bars long.
  • Bridge - A section where the song completely switches up. It sounds different from either the Verse or the Chorus. Generally fairly short: 8 or 16 bars.
  • Outro - The end of the song. Some way of making the listener feel like they have come to the end of the story. There are lots of ways to do this, depending on what you are trying to accomplish. Sometimes this is accomplished through a fade out. Sometimes the instruments will drop out and have the vocalist finish his/her line as a statement.

Wednesday, May 7, 2008

{Routing REMIX!}

So now everyone is going to do a remix of someone else's work from the last assignment. Copy the person's Reason file to your computer and immediately do a save as. Call the new file Routing Remix_(your name). You will be finishing this and putting it back on the Media Share folder to share in the next class.

Here are the rules:

  1. You can't change any of the melodies.
  2. You can add one melodic instrument of your own.
  3. You can change the arrangement (order of the different parts).
  4. You can add new drum patterns.
  5. You can change/add as many FX as you want.
  6. You can change the tempo of the song.

{Routing Assignment 2}


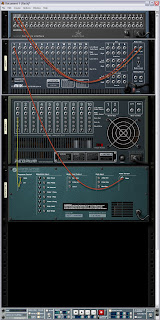
Last time, we started worked on routing the different instruments and FX in Reason. One of the main things that I had a student demonstrate was the way all the individual channels of the Redrum could be routed to the mixer. This is an important concept because it helps you to gain a greater understanding of the way sound moves around through the program, and in a studio situation.

The basic concept is that every device in Reason has an output. This output is the point where sound is coming out of the device.

Certain devices, such as FX and mixers, also have inputs, where you can run a signal from somewhere else into the device. When you're connecting two devices together, you are connecting the output of one device to the input of the other through a cable (in Reason, we are using "virtual" cables).

The most basic example of this is when you have an instrument, say a Malstrom, hooked up to the Mixer: you are taking the output of the Malstrom and connecting it to the input of a channel on the Mixer. What is happening when you want to put an effect (say, a Scream) on that instrument?

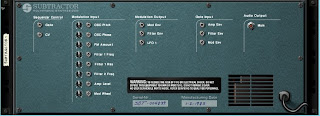
Keep in mind that while certain instruments have only a mono output (Subtractor), most of the instruments have a stereo output, which allows you to hear differences between the left and right sides of your headphones. What you have to keep in mind, is that to hear a stereo sound, you will have to connect 2 cables from the device to the input of the Mixer channel.


Your assignment is as follows:
1. Find the Reason file called "Routing Exercise" and copy it into your
folder on your hard drive.
(Media Share>Class Materials>Reason Files>Routing Exercise)
2. Open it and save it as "Routing Exercise_your name".
3. Connect the Master Outputs of Mixer 1 (the top one) to the Combi Inputs of the Mastering Suite Combinator.
4. Connect the Combi Outputs of the Mastering Suite Combinator to Outputs 1 & 2 of the Hardware Device. Why is this a weird thing to do?
5. Now connect the output of each individual Redrum channel (1-10) to the input of the first 10 channels of Mixer 1.
6. Make a beat and Insert an FX device on at least one of the drum sounds.
7. Now add at least five more instruments to your song. You will need to connect a second mixer to do this...
8. Connect the Master Outputs of Mixer 2 to the Chaining Master Inputs of Mixer 1.
9. Connect your additional instruments to Mixer 2.
10. Include at least on FX device as an Insert, and one as an Aux Send.
11. Save your song and put a copy on the Media Share folder.
(Media Share>Student Work>Reason Beats>5-7-08>Routing Exercise_your name).


Monday, May 5, 2008

{FX Routing Assignment}

Working as a class we're all going to take some turns putting FX and processors on my beat.

Here's what I want:
  • All the drums routed to their own tracks.
  • A Scream on the Kick Drum (Reason Factory Soundbank>Scream Patches>Warpkicks)
  • The same Delay on the snare and Shaker (using the Aux Sends)
  • A Unison on the Subtractor.
  • Put an Envelope Filter (Bandpass) on the Piano.
  • A Phaser on the Malstrom.
  • A Chorus/Flanger on the Piano (after the Filter).
  • A little RV7000 on everything! (using the Aux Sends)
  • An MClass Mastering Suite Combinator on the whole mix (aka after the Mixer).

Effects - part 1


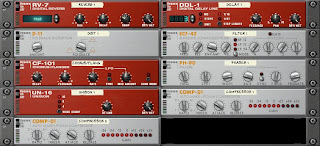
At this point we've explored every instrument in Reason. But the instruments themselves are just starting places in terms of creating and shaping sounds in your music. To help you take your sounds to the next level, Reason has a whole bunch of Effects (aka "FX") that are like virtual versions of equipment you would find in a real recording studio. And, just like the real thing you have the flexibility of setting up your FX in a number of different ways, depending on what you're trying to do. But first let's talk about the kinds of FX that exist.

So far, I've been using the term "FX" in a really general way, but let's make a quick distinction. There are two basic categories of equipment used in audio production. They are:
  1. Audio Processors (compressors, EQ, filters, distortion, phasers)
  2. Time-based FX (reverbs, delays, choruses, flangers)
"What's the difference and why should I care?" you politely inquire. Let me address the first part of your question first.

The simple answer is: the way they are traditionally used.

Processors are generally used to process the entire signal. If your signal is going through a filter, the whole thing is getting filtered. You are taking the whole sound and doing something to change it.

Time-based FX
, on the other hand, usually blend a combination of the Dry (unprocessed signal) with the Wet (processed) signal. In this case you're using the effect to add something to the signal you've already got.

OK, so let me give a quick demonstration, using the Scream distortion processor and the RV7000 reverb...


You should be aware that in a traditional studio setup, these different types of processors are generally setup in different ways.

Audio Processors are generally placed directly into the signal path of the track. This is called an Insert, because you are Inserting the processor directly into the signal path.

Time-based FX, on the other hand, are generally available through what are called Auxillary Sends (aka Aux Sends). This allows any track running through the mixer to be split off and sent to the FX unit and then be blended back into the overall mix.

So, here's the quick reference for using FX:
  • Before creating an FX processor, be sure to click on whatever you want to be putting the processor on (instrument, mixer, etc.)
  • Clicking on an instrument will Insert the processor directly into the signal path.
  • Clicking on the mixer will make the processor available through an Aux Send on the mixer.